Total Pageviews

Monday 2 December 2019

Nature's Walk Blanket Crochet-a-Long


September saw the start of a "Crochet-a-Long" by Sandra Paul (Cherry Heart on Ravelry) that had caught my eye.  I'd never done one of these before but thought that making this blanket would be a good way to use up some of my odd skeins of hand-spun yarn.  The pattern was free and comprised 8 separate patterns that were sent out weekly - 6 different squares, the pattern for joining the squares (they were crocheted together) and the pattern for the border.

We started on 24th September when the first pattern was sent out.   We'd already received an introductory square for testing gauge.  This was not meant to be included in the blanket but I thought it was pretty so made four of them to put into mine.


There were also 6 bonus square patterns, but to receive those you had to buy the yarn kit, which I didn't want to do.  The patterns for these will be available for purchase in January.


I must admit, I (along with a lot of other participants) cheated a bit.  I really liked some of the bonus squares but didn't want to wait until January to finish my blanket.  It was really quite easy to work out patterns for some of the squares, especially as there were very similar ones already on Ravelry.  I feel quite guilty about this actually, because the people who'd bought the yarn kits had effectively paid for these patterns.  Mine probably aren't exactly the same, but near enough for me.  This next square (butterflies) was one of them.


The dragonfly on the next square wasn't one of the published patterns at all, but I found a pattern on Ravelry that I liked and adapted it a bit.  I'm quite pleased with this one.


The thing I really liked about the way this CAL was run was that I only had to do 8 squares a week so it was quite easy to keep up.  I think if I'd just downloaded a complete pattern for the blanket I'd still be only half way through.


It's surprising how the squares quickly mounted up and I looked forward to finishing my blanket.


Joining the squares was very simple - we just double-crocheted them together.  Then the border was crocheted around the edge.  The first row of the border was a bit fiddly because it was easy to get the stitch count wrong.  I probably did that first row 2 or 3 times before I got it just right!


I finished the blanket on 16th November which was 4 days after the final pattern was released and I'm really pleased with how this turned out.  Can you see the little hearts in the border?  They're the same as the ones on the gauge square.

I was getting a bit panicky in the final stages - I wasn't sure I would have enough yarn to finish the border.  I needn't have worried though, I just crocheted a bit faster because everyone knows your yarn goes further that way!  This is what I had left :-


Sunday 11 August 2019

TdF Prize Donation

As usual in our Ravelry TdF team (DIY and Dye), we have prizes.  Lots of prizes!!  But they have to come from somewhere, so quite a few team members donate prizes each year.  I probably don't donate one every year, but this time I wanted to send something. The easiest and most pleasant (to make at any rate!) for me is an art batt.

So I gathered together lots of goodies and assembled three piles like this one :


From the left we have merino/tussah silk, merino/trilobal nylon, 2 unknown - these were World of Wool pouches of luck I think they're called, soy silk, white bamboo, Gotland curls in 2 shades of blue, orange bamboo, throwsters silk, 2 colours of glitz, silk noil and tencel. Not pictured, but included after I took the photo : pale blue raw silk and grey feathers!!

I hand painted the fibres onto my drum carder (which means they were applied direct to the large drum and didn't go through the small one), starting on the left with the blue and working along to the right.  After one pass through the carders it looked like this :


It was still a bit lumpy and bumpy at this point so I took it off, split it in two, and fed both halves back onto the drum.  Here's how it looked afterwards, and I was much happier with the condition of the batt.  The colours are more muted as they've blended together more, but I'm OK with that.  The colours are still there, and will (hopefully) come out in the spinning.


When I'd finished the third batt they were laid one on top of the other and rolled up.  Just added a ribbon and it was ready to go.  I think there's about 185g here.


The "spotty" bits on the next photo were the bits of silk noil and there seemed to be quite a lot of them.  I was a bit worried there would be far too many and that the batt wouldn't spin as smoothly as I'd like, but there was only one way to find out.


I had a small amount of all these fibres left, so I made another, smaller batt (it was about 55g I think). I normally don't get to test my batts like this because the whole lot usually gets sent, so having some fibres left gave me an ideal opportunity to do a test run.


I separated the batt into strips and spun from one end, just letting the fibres dictate how it was spun.  If there was a lumpy bit, it went into the yarn, the silk noils all followed and it was actually very nice to spin.  I don't know what I'd have done if it had been awful!!  I don't think I could've sent it out as a prize could I?

Because there was only a small amount of this I really didn't want to spin it back on itself to make a 2-ply yarn, and I still had quite a bit of the blue merino/tussah silk left, so decided to use that as a second ply.


Finally, here's the finished skein.  In the middle there you can just make out one of the feathers.  They spun in pretty well - I do love feathers!!  I think these came from one of our walks and I found them in the grass.  It looked like a cat had demolished a bird and left a little pile of feathers scattered on the ground.  At least I feel it hasn't died totally in vain!  By the way, it wasn't my cat who committed the crime - it was too far from home!


The prize batt has now been sent off to the U.S. to a happy recipient.  I just hope she finds it as easy to spin as I did!

Wednesday 7 August 2019

Tour de Fleece 2019

This post is a little overdue - I'm neglecting my blog again!!  Yes, I did take part in the Tour de Fleece again this year.  I think I'd find it hard not to.  I even managed to spin on my spindle when we were away in Switzerland for 5 days.

This was what I'd managed to prepare before the Tour started.  At the top is a bucketful of my home-grown cotton, the purple on the left is a blend of merino/Falkland and kid mohair dyed with logwood chips, the tub in the middle is leftover kid mohair (logwood dyed), the yellow on the right is merino dyed with apple leaves and twigs, and the other two are mohair dyed with madder.  The one on the left is dyed with the water from pre-rinsing the roots (I just couldn't bring myself to throw it away as there was lots of colour in there), and the one on the right is the first dip in the madder solution.


So, I started with the purple rolags, this was a nice blend and spun really well.  It was about 80g I think.


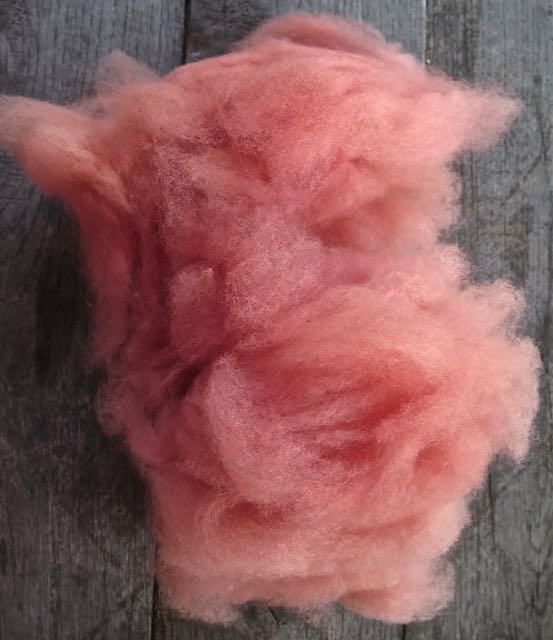
For the second ply I blended some of the kid mohair (madder and logwood) on my carders to make some two-coloured rolags.  I just love that pretty pink at the bottom!


The two bobbins ready to ply :


and the finished skein.  The toilet roll holder shows how much of the purple was left after plying . . . not much!


Next up, I started spinning the yellow rolags (merino dyed with apple leaves and twigs)


There actually wasn't a lot of this, maybe 50 to 60g, so I rooted around in my cupboard and found these rolags for a 2nd ply.  This is some merino I dyed a few years ago and haven't gotten around to spinning until now.


These were a bit "neppy" to spin, and I started off picking them out every time I came across one, then I thought, oh what the heck, it'll add a bit of texture!


Unusually for me, I prepped some more fibre to make a 3rd ply.  I normally just stick to 2-ply (unless I'm chain plying).  So, this is some Falkland dyed with dyer's chamomile :


At this point, I started to wonder if this yarn was going to work.  The one on the left (the merino dyed with lichen and dock seeds) was so very different.


I plied them together anyway, and was actually very surprised how well they did go together.


By now we were entering the 2nd week of the TdF and I started to spin my cotton.  I haven't spun any for quite a long time, and it took me a while to get going again.


I spent a few days on this, and then realized our Swiss trip was rolling up faster than I'd thought, and I didn't have anything prepared to take with me.  I'd already dyed some merino in the madder bath, so I combed that for spinning on my spindle.  Incidentally, I strained the madder roots out from the previous dye bath and put them in the blender with a bit of water to break them up a bit more.  That way I thought I'd get more colour from them.


We were visiting family in Switzerland because our nephew was having his 40th birthday, plus he got married in June so he decided to have one big party to celebrate both events. After the party we stayed with brother-in-law and his wife in their chalet half way up a mountain.

This is the view from their terrace - it's a bit hazy over the mountains so they weren't very visible.


I managed to spin all of the fibre by the morning we were due to leave, so I took our travelling day as one of my "rest days".

When we got home I combed up some Falkland.  This had been dyed in the madder bath after the merino came out.  So, including the "rinsing water dye", this was the fourth lot of fibre to be dyed with the madder roots.  This was to be a 2nd ply to go with the merino.


Ready to ply :


Oooops!  While I was plying, I couldn't understand where the strange scraping noise was coming from, or why the tension was all over the place, until I realized the end had fallen off the bobbin!  Luckily, the yarn didn't get too tangled and I was able to transfer it to another bobbin to finish plying.  Some of my Ashford bobbins are 30 years old this year, so it's not really surprising they're feeling their age!


Then, for the final sprint to the finish line, it was back to the cotton.


I plied what I'd managed to spin on the last day of the Tour.  I only had one bobbin of cotton, so I made it into a centre-pull ball and plied from each end.  Not so difficult a task if you keep your thumb through the centre of the ball so it doesn't knot up inside.


The cotton was finally dyed with woad from the garden (our Ravelry team is DIY and Dye, which means everything has to be prepared from raw fleece, with no commercially-prepared fibres being allowed, and then it has to be dyed.  Well, it can be dyed beforehand if you like, but at the end everything must have been dyed).

So, here's the finish line photo :


The final details are :-

The yellow is a 3-ply mix of merino/Falkland, one strand dyed with dyer's chamomile, one ply with lichen and red dock seeds, and the 3rd with apple leaves and twigs.
150g, 357 yards/329m, 14 wpi.
This was the only one that was 3-ply, the rest are all 2.

The pink/purple is merino/Falkland/kid mohair dyed with logwood chips and madder.
130g, 256 yards/236m, 14 wpi.

Pink was merino/Falkland dyed with madder.
60g, 159 yards/147m, 12 wpi.

And the blue was my home-grown cotton dyed with woad.
40g, 159 yards/146m, 18 wpi.

So, the end of my 7th (?) Tour.  Not sure about this, I may have joined in with another team the year before.

Sorry this is such a long post - next time I'll try and remember to post maybe at the end of each week.  If you've persevered down to here, go and make yourself a gin and tonic . . . you deserve it!

Saturday 1 June 2019

Slow Yarn

This has to be the slowest yarn I've ever produced.  I started this at the beginning of March using my one and only drop spindle.  I really didn't find it easy at first to use and the air was often blue as I discovered the reason this is called a "drop" spindle.  I think I was probably at least half way through this project when I finally started to find it a bit easier.


Still, it took me until almost the end of May to finally finish this.  I really bought this spindle so I'd have something to spin on while we were on holiday in the English Lake District in March.  We were away for 10 days and I thought I'd have this finished in no time.  Well, the 10 days came and went and I was still struggling to get the hang of this.


When we returned home, it was put aside and picked up occasionally.  For the first time in 30 years, I really was not enjoying my spinning.

The turning point came when hubby and I were forced to spend two 3-day visits to hospital in Toulouse in May.  After straining to lift something too heavy for him, Eric suffered a heart attack.  We didn't realise at first that it was so serious because he had absolutely no pain. Just a "strange feeling" in his chest and right elbow.  We really thought he'd just pulled a muscle, but the next day, even though he was feeling better, imagination took over and we thought he'd better see the doc.  He actually didn't think there was a huge problem, but said he would put him through some tests anyway.  Two days later we saw a cardiologist who confirmed that he had indeed had a heart attack.  To say we were devastated is putting it mildly.  He just isn't a typical candidate for heart problems : doesn't smoke, low blood pressure, normal cholesterol, good diet, no family history, etc.

At the beginning of the next week we checked into a hospital in Toulouse where he was to stay for 2 nights.  I was able to stay with him while he was in there, which was nice.  On the second day he had an angiogram which showed one artery with some narrowing, and another artery totally blocked by a blood clot (caused when he over-strained whilst lifting). We were sent home on the 3rd day with a bag full of medications, and he then had two anticoagulant jabs in his stomach each day in the hope (small hope) that the blood clot could be dispersed.

The following week, we were back in Toulouse for another stay.  He was supposed to have an MRI when he checked in so the cardiologist could look at the blocked artery and see what he would be able to do to repair it.  The other narrowed artery was easy - just put in a stent.  We asked on every possible occasion when he was going to have the MRI and no-one seemed to know, the following morning, after asking two or three more nurses what was happening, he was told he would not be having the MRI because they hadn't been able to book him in.  It was too busy.  Therefore he would have the stent fitted to the other artery and would have to come back another time for the MRI and treatment for the other artery.  We were gutted!!  But, there was nothing we could do, so in the afternoon he went down to the operating theatre for angioplasty.  After the procedure, the cardio gave him the good news - the blood clot had disappeared!!  He was able to put in a stent and finally put an end to the problem.  I can't tell you how happy we were.  He is now home again recuperating and taking things very easy.

Anyway, back to the slowest yarn I've ever made.  During all the inactivity in the hospital, I finally managed to finish it.  By the end, I'd actually started to quite enjoy the process.  So much so that I even started another one.

However, this is how it turned out.  154 yards/142m, weighing in at 75g.


I think the spindle may stay in its box for a while, but we do have a trip to Switzerland in July when I'm sure it'll surface again.  Now that I've got used to it, I can't believe it's taken me 30 years to buy a spindle!


Saturday 9 March 2019

Another Rabbit Hole??

After 30 years of spinning on wheels, I thought I was a pretty good (well not bad anyway) spinner.  I've tackled most fibres, spun directly from the fleece, in the grease, cotton isn't a problem for me now . . . so why the heck, when I decided to buy a drop spindle to take on an impending holiday, am I having so much trouble?


I thought, if you're going to get a drop spindle, get a fairly decent one.  So I chose a beautifully made spindle by Enid Ashcroft in the UK.  She has a Ravelry group dedicated to her spindles, and an Etsy shop here.  If you're at all interested in any type of spindle, check her out, she has some fabulous ones.


This one is made from yew, walnut, sapele and brass and weighs only 20g.  She sends her spindles all over the world and has a very good reputation.

So, should have been easy yes?  Well, no, I actually feel like a brand new spinner rather than someone who's been spinning for such a long time.  I'm having a real struggle getting the spindle to spin for any length of time (probably my own clumsiness), and have proved to myself on numerous occasions how this actually got its name ("drop" spindle?).  After struggling along for a few days, I can report a bit of improvement, but I still have a way to go.

I'm determined to get this, but I'm not sure I'll be investing in any more spindles.  It will come in useful on our holiday, but I think at home I'm firmly glued to my spinning wheels.  Pity, because I really have my eye on a gorgeous little "midge" she has in her shop!!

I did notice when I visited her Ravelry group that people had an awful lot of her spindles. They seem to breed prolifically and produce copious amounts of offspring.  Maybe it's best if I don't manage to get on with this spindle eh?


Monday 4 February 2019

Maria's Quilt

About a year ago a friend (Maria) posted a photo on Facebook of a beautiful quilt she'd seen and asked if anyone would be willing to make it for her.  Actually, she asked if someone could do the crochet part if her Mum made the patchwork squares - and I replied.  When her Mum decided it was maybe a bit too much for her, I offered to do the whole thing . . . as long as she wasn't in a hurry!!

She loved the fabrics used to make the original quilt and wondered if I could buy the same ones!  Hhmmm, that was a difficult one as I had no idea of the origin of the fabrics - they could have been years old.  I spent quite a lot of time on the internet looking at fabric suppliers and by the time March arrived when we were due to visit the UK I had found nothing!  Whilst on our trip to Scotland I visited quite a number of fabric stores and eventually found two fabrics (from John Lewis) to start off the collection.


Maria wanted old-fashioned type roses and I thought I was quite lucky to find these.  I just hope she thinks so too!!

A few more sessions on the internet after we got home eventually provided the rest.  The fabrics on the bottom right are some gorgeous batiks that I found for the reverse side of the quilt.


Once I'd amassed all the different fabrics I started the sewing.  Each 6" square was made up of either one piece of the same fabric (the blue or white in the first photo) or a collage of 2, 3 and 4 different ones.


Then they had to be sandwiched to the backing fabrics with a piece of wadding in between.  Quite time-consuming, but very satisfying when I had a nice pile of neat padded squares.


The next step was to machine stitch about a quarter of an inch from the edge all round, and then blanket stitch around each square with the yarn I'd chosen to join them all together.  This, and the crochet, was going to be the easy part . . . ha!  Or so I thought!


Surprisingly, it took 20 minutes to blanket stitch around each piece.  I made a cardboard template to show me where to put each stitch and pinned it onto the fabric.  As you can see, it's pretty well used.  And this was the third one I think!


Next step was to crochet around each square.  I found a pattern on-line and followed that, but once I'd finished all the squares and started to join them together, I realised I didn't like they way they looked. The pattern was the pretty much the same as the ones in the following photo, but the little shells were made up of triple trebles and produced large "holes" where the squares were joined.  I just wasn't happy with it so I decided to pull the crochet back to the first row of double crochets all around the blanket stitch, and re-did it with trebles.  This looks much better I think, and reduces the size of the holes in the blanket.  That might seem a bit drastic, especially as it took 45 minutes to crochet around each square originally, but with the more simple edging that I finally settled on, it only took about 15 minutes to re-do each one.


The next step was to join all the squares together.  The pattern that I'd found said to whip-stitch them together using the same yarn as the crochet.  I did try this, but I just couldn't get it to look very neat.  Instead I crocheted them together using slip stitches - much neater.

When they were all joined together, I crocheted two rows of double crochet around the edge.  I just wanted something simple for the outside and I think it works.

So, finally, here is the finished blanket :-


The back is made up of the two batik fabrics, which I love.


During the initial stages of making this quilt I decided it would make a really good wedding present for Maria and Jean-Louis who were getting married on 9th June 2018.  She still doesn't know this and is expecting to pay for it!  Unfortunately, it took far too long to finish before June and then I had interruptions for the Tour de Fleece in July, Spinzilla in October, and two baby blankets that had to be made for 2 new grand-daughters! Oh, and not forgetting Christmas!!  Maria and Jean-Louis have just returned from a late honeymoon in the Maldives, so hopefully the wedding is still fresh in their minds and they won't mind it being so late.