Total Pageviews

Saturday 28 April 2012

Breakthrough

Yesterday (Friday) I had my most favourite lunch in the whole world - boiled eggs and toast fingers (soldiers . . . although we used to call them piggy fingers!)  This was the first time I'd been able to eat this meal for the last six months, because that's the length of time I've been unable to eat bread.

After numerous little experiments, I realised it was the yeast that was affecting me and making me feel so ill.  The only way round this has been to make tortillas and plain scones and have those instead.  But it just didn't taste right with boiled eggs.

Then, about a month ago, a friend of ours sent me some kefir grains (they actually look like little cauliflower florets, but they're soft) which you put into milk for 24 hours at a time to make a cultured drink.  I didn't really like to have so much milk though, so I started putting mine in soya milk every alternate day and that was much better.  It ends up a bit like thin yoghourt with a bit of a fizz and a tangy taste.

The other day I was lying in bed, thinking.  It suddenly occurred to me that maybe I could use this in home made bread to make it rise.  So I Googled the question, and sure enough found quite a number of recipes on the internet.  I picked a really easy one and had a go.  You can see the result here :-


Yes, that's bread, real bread.  It's very like sourdough, with a delicious nutty taste.


Bon appétit!


So how was your day?

Just when you thought it was safe to read my blog and not be bombarded with silkworm photos, have a look at these.  Aren't they growing fast?  They only have one more skin change to go before they begin to make cocoons and they're eating like crazy.


Remember when they first hatched and they just about measured 2mm?  Well they're now almost 5cm.  Not bad in 19 days!

Thursday 19 April 2012

Tell Me if You're Getting Bored

You must be getting really sick and tired of looking at photos of silkworms; the last three posts have been full of them!  Well, guess what?  So's this one!!

Second skin change completed yesterday (they're moving on fast) and they're starting to look more like they should - black and white stripy.


In the meantime, I have been spinning, but don't really want to show you yet.  It was my sister's birthday on the 8th, and she's had part of her present, but we decided I'd spin her some wool as the second part.  She knows she's getting it, but she doesn't know what it will look like, so rather than spoil the surprise, you'll just have to wait.

Sunday 15 April 2012

. . . And the Worms They Are a-Changing


I don't know if you can see, but this little worm is just going through it's first skin change. The dark splodge on the leaf behind it is it's old skin that it has just walked out of.


Here's another view of it - just the tail end to go.


They now have shiny new black noses!

Friday 13 April 2012

63 and Counting

Silkworms that is, in case you hadn't already guessed.  The eggs have carried on hatching over the last three days but are now slowing down.  Some of the remaining eggs will definitely not hatch - either they're infertile (yellow) or they're just not the right colour or shape.  There are still some which look like they might hatch though so I'm keeping them warm and hoping.

The older caterpillars are starting to lighten in colour now.  They will go through a few changes before they finally become stripy.  They're still very small and are very easy to miss amongst the leaves.  Yesterday I cleaned them out and I have to be really careful not to "throw the baby out with the bathwater".  I only do this every couple of days, so hopefully by the next time they'll be a bit bigger and more visible.  I just lay fresh leaves on top of the old ones, and as the worms climb onto the new ones, I transfer them into a clean box, and count them at the same time so I don't miss any.  The old leaves and droppings go onto the compost heap.

One important lesson I've learned from last year's silkworm raising is patience.  Last year, when it came to cleaning them (which I did every day - I now realise that's a bit too much disturbance) I was anxious to get them all moved over to their new quarters as quickly as I could, and helped them onto the new leaves. The problem with this method comes when they are shedding their old skins.  They exude a bit of silk from their back ends which effectively glues the old skin down to a leaf or the paper they are kept on.  Then they just wriggle and walk out of them.  If they're lifted up or knocked, the old skin becomes unstuck and they can't escape from it.  I think I probably lost several that way last year.  So this year I just have to wait for them to climb up themselves before moving them.

Still a lot to learn.  There can be lots of difficulties along the way as they progress towards making those cocoons, but hopefully this year one of them won't be me!


Monday 9 April 2012

Yippppeeeeee!!! They're Hatching!

Welcome to my silkworm project 2012 - yes, that's right, silkworm (singular).

This morning I put the box of eggs in the greenhouse as that was the warmest place.  I checked them a few times during the morning, especially as the eggs had lightened in colour by today.  Apparently this indicates that they're ready to hatch because they've separated from the egg shell.  Checked again after lunch, and here was this little fellow, rushing around looking for food :-


I gave it a leaf, and once it had climbed onboard I transferred it to it's own plastic box to wait for it's siblings to hatch.  Quite often, only a few will hatch the first day, with the majority arriving on the second, and stragglers on the third.


Here it is enjoying it's first meal!

I'm sooo excited, because this is the first hatching from eggs laid by one of my silk moths last year.

Anyway, must go and check to see if any more have hatched.  I'll try and restrain myself from posting photos of each one as it hatches!

Just thought I'd take a photo with a ruler alongside to show you just how small these are, and voila, there was another one!


 OK, no more photos today.  Promise!

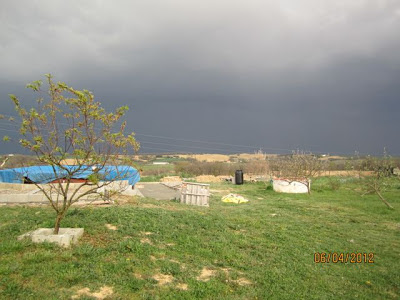
Storm Clouds

Time to batten down the hatches


Bramley just starting to flower


Apple Blossom

Monday 2 April 2012

Tammy's First Yarn!!!!

You may remember, a short time ago I posted about our new neighbours, and the fact that Tammy wanted to learn to spin?  Well, she's been up here four times recently for lessons and today finished her first ball of yarn.  Was she proud?  Well I was!!


The yarn doesn't really show up very well here as it's a very similar colour to her top.  So here is the finished skein :-


55g and 56 yards of merino.  I don't know about you but I think this is pretty spectacular for a first attempt.


And when Rob, her partner, sees this, he's really going to do some shopping around for the sheep he wants to keep on their land.  Any suggestions?  I think he should get some merino, plus angora goats, plus a few alpaca, plus the odd angora rabbit etc. etc.!!! (Hope you're reading this Rob?)


Tammy bought some beautiful natural grey merino, plus 50g each of blue and white merino, so she spun half a bobbin of grey, and then half a bobbin of grey with blue and white alternated.  Cool huh?

She finished it about mid-afternoon, so we skeined it, washed it and hung it in the sun for a few hours until it was dry.  Then she hot-footed it down the hill to show Rob and photograph it to send to her family!  Yep, I think she was pretty proud of herself, with good reason too!

Sunday 1 April 2012

Secret Project Revealed

Today I can show you what I've been working on recently, as it should have reached it's destination by now.
Hand-spun merino and silk

Yesterday was my friend Sandra's birthday and I wanted to make her something special. Sandra is very good with her hands and has made me all sorts of fabulous things in the past - they're always special.  I usually struggle with what to make for her each year, but this year I knew exactly what I was going to do.


Sandra is one of the few people I know who will really appreciate how much time and effort goes into making something like this . . . because she puts just as much, if not more, into her own projects.  Maybe I should do a separate post with some photos of some of the lovely things she's sent to me over the years.


So, the yarn is spun and dyed.  Next step, knitting.


I decided to make another Annis shawlette.  I made one last year for my sister's Christmas present and it gave me so much grief I'm amazed I ever got it finished.  The main problem was that I didn't have the right size circular needles, so decided to use ordinary knitting needles.  Big mistake!  The outside (pointy) edge of the shawl is the cast on edge.  That's 363 stitches!  I made them fit on the needles, and off I went. It took me about three days to do the first 4 or 5 rows.  At one point I had to cut the yarn and start afresh because the wool was getting worn out.  This pattern has so many yarn-overs, and if you can't see what you're doing it's easy to make mistakes.  Amazingly, after all the blood, sweat and tears, once I'd finished it I immediately wanted to do another.  Just to prove I could!

This time, I invested in the right size circular needles, so this time it was going to be a doddle - right?  Yeah, right!  Actually, I only had to pull out a few little bits so it wasn't too bad.

And here's the finished shawlette :-


OK, confession time!  I finished the knitting, washed it and pinned it out to block it to shape.  And there it was, right in the middle of the patterned edge - a dirty great big hole. A dirty great big hole that shouldn't have been there!  I was so horrified I nearly cried.  To fix it properly would have meant pulling the whole thing back and starting again.  And it had to go in the post the next day.

HOW COULD THIS HAPPEN TO ME???

Well, it was obviously a dropped stitch, so I got a crochet hook and carefully picked up the stitch and worked it up to where it should be.  Then I stitched it together to hold it.  If you look very closely, it's visible.  But if you half close your eyes at that point, it looks fantastic!

And no, I didn't take a photo of the hole . . . and no, I'm not going to show you the repair. That's my secret!  (You won't tell her will you?)

Flowers and Worms

The weather is absolutely glorious at present.  The fruit trees are all in flower and there are blossoms springing up everywhere.  Yesterday (actually, it was the day before yesterday - I started this post on the 31st, but by the time I'd finished it, it was 10 minutes past midnight on the 1st) I went for a walk in the woods again and found all sorts of things in bloom, from little wood violets to may flowers to blackthorn and celandines, plus a few others I can't remember the names of.


How pretty are these?

And back at home, the buds on the mulberry tree have started to break.  There are going to be lots of flowers this year (and, therefore, fruit!), but, more importantly, the leaves have started to sprout too.  Which means I was able to take some of my silkworm eggs out of the fridge today.


I took just over 100 out, which leaves maybe 150-200 eggs still in the fridge.  So if I manage to kill them all off, it's not the end of the world.

I put these into a clear plastic box and then put that into a cardboard shoe box.  They've moved around a fair bit today - they started off in a shady spot in the greenhouse, but when that got too hot I brought them back to the patio table which is nice and shaded in the afternoon.  Then this evening they've gone into our bathroom on top of the water heater.  Fingers crossed that they all hatch . . . maybe I should put them in our mail box . . . that's where they hatched last year!