Total Pageviews

Showing posts with label Cotton. Show all posts

Sunday, 13 December 2020

Cotton Harvest 2020

Well. from that one boll I showed you 2 months ago, the plants did pretty well.  I still have a small number of bolls that haven't yet opened, but I brought them into the warmth of the house so I'm sure they'll open up soon.

In the meantime, I've been busy finishing last year's cotton.  I had a bit of a lapse whilst spinning this bobbin because of a problem with my neck (which turned out to date back to a car accident we had 27-28 years ago - the osteopath said my neck was out of position and probably had been for all that time!) but it finally got finished.  I'm not sure how much there is here but these bobbins normally hold about 135g of spun wool.  This cotton is wrapped pretty tightly on there and I suspect there may be more than that.

I'll be using this as one ply and this year's cotton will be the 2nd ply, so far from finished yet.

I don't have a photo of all this year's bolls but they must have made quite a pile.  From 10 plants I have 135 bolls already open, with between 12 and 15 still to go.  That makes about 14 bolls per plant, not bad really!

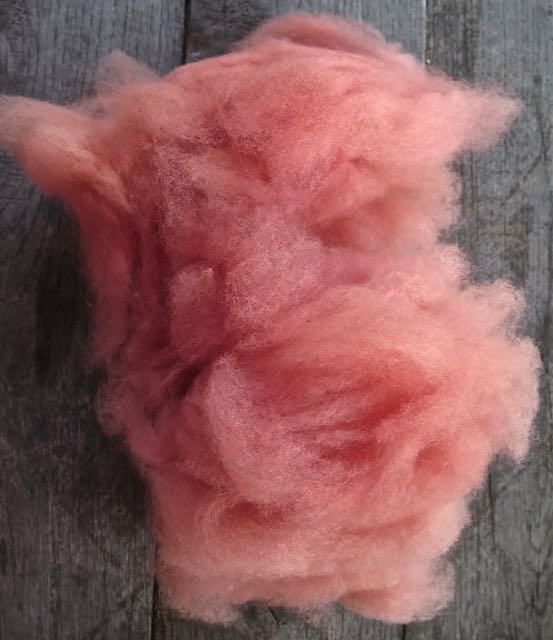
This is the fluff that I've picked out so far :-

It doesn't look much here, but actually weighs 440g.  OK, that still contains the seeds so I expect the weight will go down considerably.

I find this photo so cute.  In each boll there are between 3 and 5 segments normally (I've never seen a 6 segment, but maybe it's possible) all full of fluff and seeds.  In each segment there are usually about 5 or 6 seeds, each seed surrounded by its own fluff.  The little cutie above is one seed with its respective fluff fanned out around it.

The next step is to gin the cotton (i.e. remove the seeds), then card the cotton ready for spinning.

The final problem is - what do I do with all the "skeletons"?  I normally keep them for months and months wondering what I could use them for, then throw them away eventually!  This year I bought some silver spray paint and some glitter and have started to make Christmas decorations.  Actually, I think they'd make pretty little angels because they do look a bit like ballerinas, but I haven't finished playing yet.  This is as far as I've got:-

Waste not, want not!!


Wednesday, 30 September 2020

Just a Photo . . .

 Yes, it's that time of year again.  First boll of the year.


Many more plants are opening their bolls now.  Hoping for lots.


Wednesday, 7 August 2019

Tour de Fleece 2019

This post is a little overdue - I'm neglecting my blog again!!  Yes, I did take part in the Tour de Fleece again this year.  I think I'd find it hard not to.  I even managed to spin on my spindle when we were away in Switzerland for 5 days.

This was what I'd managed to prepare before the Tour started.  At the top is a bucketful of my home-grown cotton, the purple on the left is a blend of merino/Falkland and kid mohair dyed with logwood chips, the tub in the middle is leftover kid mohair (logwood dyed), the yellow on the right is merino dyed with apple leaves and twigs, and the other two are mohair dyed with madder.  The one on the left is dyed with the water from pre-rinsing the roots (I just couldn't bring myself to throw it away as there was lots of colour in there), and the one on the right is the first dip in the madder solution.


So, I started with the purple rolags, this was a nice blend and spun really well.  It was about 80g I think.


For the second ply I blended some of the kid mohair (madder and logwood) on my carders to make some two-coloured rolags.  I just love that pretty pink at the bottom!


The two bobbins ready to ply :


and the finished skein.  The toilet roll holder shows how much of the purple was left after plying . . . not much!


Next up, I started spinning the yellow rolags (merino dyed with apple leaves and twigs)


There actually wasn't a lot of this, maybe 50 to 60g, so I rooted around in my cupboard and found these rolags for a 2nd ply.  This is some merino I dyed a few years ago and haven't gotten around to spinning until now.


These were a bit "neppy" to spin, and I started off picking them out every time I came across one, then I thought, oh what the heck, it'll add a bit of texture!


Unusually for me, I prepped some more fibre to make a 3rd ply.  I normally just stick to 2-ply (unless I'm chain plying).  So, this is some Falkland dyed with dyer's chamomile :


At this point, I started to wonder if this yarn was going to work.  The one on the left (the merino dyed with lichen and dock seeds) was so very different.


I plied them together anyway, and was actually very surprised how well they did go together.


By now we were entering the 2nd week of the TdF and I started to spin my cotton.  I haven't spun any for quite a long time, and it took me a while to get going again.


I spent a few days on this, and then realized our Swiss trip was rolling up faster than I'd thought, and I didn't have anything prepared to take with me.  I'd already dyed some merino in the madder bath, so I combed that for spinning on my spindle.  Incidentally, I strained the madder roots out from the previous dye bath and put them in the blender with a bit of water to break them up a bit more.  That way I thought I'd get more colour from them.


We were visiting family in Switzerland because our nephew was having his 40th birthday, plus he got married in June so he decided to have one big party to celebrate both events. After the party we stayed with brother-in-law and his wife in their chalet half way up a mountain.

This is the view from their terrace - it's a bit hazy over the mountains so they weren't very visible.


I managed to spin all of the fibre by the morning we were due to leave, so I took our travelling day as one of my "rest days".

When we got home I combed up some Falkland.  This had been dyed in the madder bath after the merino came out.  So, including the "rinsing water dye", this was the fourth lot of fibre to be dyed with the madder roots.  This was to be a 2nd ply to go with the merino.


Ready to ply :


Oooops!  While I was plying, I couldn't understand where the strange scraping noise was coming from, or why the tension was all over the place, until I realized the end had fallen off the bobbin!  Luckily, the yarn didn't get too tangled and I was able to transfer it to another bobbin to finish plying.  Some of my Ashford bobbins are 30 years old this year, so it's not really surprising they're feeling their age!


Then, for the final sprint to the finish line, it was back to the cotton.


I plied what I'd managed to spin on the last day of the Tour.  I only had one bobbin of cotton, so I made it into a centre-pull ball and plied from each end.  Not so difficult a task if you keep your thumb through the centre of the ball so it doesn't knot up inside.


The cotton was finally dyed with woad from the garden (our Ravelry team is DIY and Dye, which means everything has to be prepared from raw fleece, with no commercially-prepared fibres being allowed, and then it has to be dyed.  Well, it can be dyed beforehand if you like, but at the end everything must have been dyed).

So, here's the finish line photo :


The final details are :-

The yellow is a 3-ply mix of merino/Falkland, one strand dyed with dyer's chamomile, one ply with lichen and red dock seeds, and the 3rd with apple leaves and twigs.
150g, 357 yards/329m, 14 wpi.
This was the only one that was 3-ply, the rest are all 2.

The pink/purple is merino/Falkland/kid mohair dyed with logwood chips and madder.
130g, 256 yards/236m, 14 wpi.

Pink was merino/Falkland dyed with madder.
60g, 159 yards/147m, 12 wpi.

And the blue was my home-grown cotton dyed with woad.
40g, 159 yards/146m, 18 wpi.

So, the end of my 7th (?) Tour.  Not sure about this, I may have joined in with another team the year before.

Sorry this is such a long post - next time I'll try and remember to post maybe at the end of each week.  If you've persevered down to here, go and make yourself a gin and tonic . . . you deserve it!

Wednesday, 12 December 2018

Christmas Dyeing


As usual, I'm working almost at the last minute to get Christmas presents made.  Each year my friend in the UK and I exchange something we've made.  As the years go by it gets more and more difficult to come up with something I haven't already made for her.  But this year I had a brainwave - why not make something, if not exactly for the Christmas table, then something for the table that can be used every day of the year.  Placemats and napkins!  And what better way to add my own personal touch than dyeing them with natural dyes.

I ordered some Egyptian cotton from Empress Mills in the UK.  They were offering pieces just big enough to make one placemat and one napkin for £5 which I thought was pretty good.  So I ordered two.  The fabric when it arrived was really nice quality and I can see myself buying more next year when her birthday comes around.


Firstly, I washed the cotton in hot soapy water to make sure there were no residues or finishing substances still on there, then I soaked it overnight to make sure it was well and truly wet through.  Since I've never done any tie-dyeing before, and it didn't look too difficult, I thought I'd give it a go.  I was hoping to maybe get something resembling flower shapes, so tied little scrunched up pieces of material with elastic bands.  So far so good.


The next step was making the dyes.  I decided to make life a bit easier, since I didn't have a lot of time, and use natural dyes which didn't need a mordant for the dye to adhere to the fabric.  Onion skins are usually pretty good for that, and I had a large bag-full in my cupboard.


After boiling the skins in water for an hour or two, the dye was looking pretty impressive:-


so in went one of the sheets of fabric and I heated it for an hour before checking the colour.  After an hour, the fabric had hardly taken any colour at all!  By now I was feeling a bit despondent, thinking maybe I should have mordanted.  Anyway, I gave it another couple of hours simmering and it started to look a bit deeper.  In the end I turned off the heat, thinking that was as dark as it was going to get, and left the whole thing overnight to cool.  I was actually quite amazed the next morning to see just how much more colour the fabric had absorbed.  It's not quite the same as dyeing wool with onion skins as normally I would have got yellow or orange, but I'm still happy with the colour.

At this point, you'll notice my photography skills were slightly lacking - i.e. I didn't take any of the fabric as it came out of the dye pot.  Still, I'll show you the finished result at the end.

Next up, woad.  Woad never lets me down, never fails to amaze me, and always looks great when it's finished.  I was quite hopeful.


I picked, washed and chopped about 600g of woad leaves and poured almost boiling water over them so they were all covered.


After leaving for an hour to steep, I strained out the leaves and added some washing soda to make the solution alkaline.


Then came the aeration part.  I used an electric hand mixer to whisk the whole lot up.  I think I may have used a bit too much washing soda because the suds were spilling over the side of the bowl!  You probably can't see too well in this photo, but the foam does have a slight blueish colour.


This was then left to stand for the bubbles to dissipate, then I sprinkled the surface with Spectralite which removes oxygen from the mix.  After about half an hour the fabric was carefully added to the dye liquid.  This was particularly difficult with fabric because it holds air in the folds.  The trick with woad dye is to keep all air out of it which is quite easy with soggy wool.  I did get air in the dye, and wondered if I'd get any blue at all.  Happily, I wasn't disappointed and the fabric came out a beautiful pale to mid-blue.  How can you not love woad?

Here are the finished results, starting with the onion skin dyed set.  It's quite a lot browner than I expected, but it's actually quite a nice brown considering it's a colour I hate with a vengeance!!  I sewed the name of the dye using embroidery silks, unfortunately not dyed by me!  I didn't exactly get flowers with this either, but the shapes are quite interesting.


The woad set is my favourite, I must admit.  Again, not quite flowers, but, given that the fabric was tied in exactly the same way as the other one, the woad attached itself in quite a different way to the onion skin dye.  Hubby thought this would make a really nice dress fabric, so that's something to aspire to next year.  I think I'll need more than 600g of leaves though!


The plan is to make another four sets like these for my friend, each one using a different natural dye.* I need to start in good time though because mordanting cotton is a bit more complex than wool and I want to be sure I get it right.  I think I was lucky this time!

*The friend I made these for is a little bit unconventional when it comes to sets of things.  I think she'll quite like the idea of having, eventually, six different coloured place settings on her table.  Last year she sent me odd socks after admitting that I sometimes wore them and her admitting that so did she!! 

Wednesday, 28 December 2016

Cotton Prize

My prize for winning the cotton spinning competition arrived just before Christmas - perfect!

This is what spilled out of the box when I opened it :-


In more detail, I asked Joan for a copy of her book on cotton spinning on a wheel, and also her dvd "Cotton Spinning Made Easy".  I'm really looking forward to getting into these, hopefully to improve my rather strange (I think!) method of spinning cotton.  It works, but there's probably a better way.


Also, I couldn't resist this rather handy looking bobbin winder.  The bobbins can be used to ply from as they fit most lazy kates, and, as an added bonus, the bobbins can be inserted into a weaving shuttle to use with a loom (if I ever get that far!)  The little green ruler at the bottom was an extra.


There was also lots of cotton to spin, some of it ready to go, and some to play with whilst carding.


Another extra was this cute little bag, perfect for carrying/storing my current cotton spinning project and accessories!


And, last but not least, even the packaging material is spinnable (I had to ask her that, because I wasn't sure).  This is Acala cotton lint from her neighbour's fields.


A fabulous prize and I can't wait to get started after Christmas and New Year.  Thank you so much Joan for organizing the competition, and especially for donating such a brilliant selection of goodies!

If you would like to see the other entries, you can view them here.


Thursday, 1 December 2016

2016 Cotton Harvest Photo Contest

Earlier in November I entered a cotton harvest photo contest run by Joan S Ruane of www.cottonspinning.com.  Joan has been teaching spinning for almost 30 years and now lives in Arizona.

2016 is the second year this contest has taken place, and this year was judged by Cary Ann Ely who works for the US Department of Agriculture in Wilcox, Arizona, assisting cotton farmers to improve their crops through soil management practices.

I trawled through all of my photos of the cotton I've grown over the past few years, but finally decided on one from this year's harvest :-


I called it "Stranger in the Crowd".  The sienna coloured boll was grown from some seed cotton I bought earlier in the year from Sally Fox.

There were some really good photos entered into the competition and, to be quite honest, I really didn't think I had much chance of winning.  Imagine how surprised I was, therefore, to return home from holiday (just had 2 weeks in the UK visiting family and friends) to an e-mail from Joan saying my photo had won $75 to spend on anything I like from her shop!!!

A couple of hours later I'm still feeling pretty gob-smacked.  Very flattered also that Cary Ann would like to enlarge the photo to put on the wall in her office.


Monday, 10 October 2016

Step-by-Step Cotton Picking Blues

Ever wondered what 83 cotton bolls look like?  No?  Well I'll show you anyway!


These were the first bolls to open on my white cotton this year, so when I had a significant amount I started to process them ready for spinning.  Whole bolls take up quite a bit of space, so first step is to remove all the fluff from them.


I try to remove bits of dried leaf as I go so I end up with nice clean clumps of cotton. These clumps are then separated into individual seeds, i.e. each seed is attached to its own surrounding bundle of fluff (technical term!).  So far, these two processes are relatively easy and non-time consuming.

Ha ha - then comes the dreaded ginning!  Each little parcel of fluff has to be separated from the seed that it is clinging to.  I've tried a few methods of doing this - initially when I first spun some cotton I fluffed out the cotton on each seed (a bit like a halo) and spun directly from the seed.  Then I read that a pasta maker would remove them effectively if the cotton was run through the rollers with a piece of denim, and in theory (in practice too - I've seen videos of other people doing this) the seeds are left on top of the rollers after the cotton has departed through them.  Hhhmm, it doesn't work for me.

I finally found that the best (but very time consuming) way for me was to roll the seed out of the cotton using a wooden dowel on a non-slip tile.  I can show a photo of this in progress, but only with green cotton (my latest project).


The seed is the bit at the top of the dowel, about to be released, and the newly-ginned cotton is the pile at the top left of the tile.

One day, if I keep growing this amount of cotton, I would like to invest in a miniature cotton gin, but at the moment I feel I need to be sure I'll have enough cotton in the future to warrant it.  They're quite expensive.

The next step is the carding.  When I first started carding cotton earlier this year, I thought it was going to take quite a bit of effort to get the cotton nicely aligned and rolled up ready to spin, but actually this happened pretty easily.  Each carder-full was brushed three times from one card to the other and then rolled around the wooden dowel to make punis (the smaller, cotton variety of a rolag).  Easy peasy.  Green cotton again here as I forgot to take photos of the white.


Then came the interesting part - the spinning.  This has been done on my Louet Victoria because we were about to go off camping when I started and I wanted to take some spinning with me.  Also, cotton needs lots of twist and the best way of spinning it is by using the smallest whorl - the black drive band on the left has been moved to the smallest one; normally for spinning wool I have it on the largest, i.e. right next to the wooden upright.

Note : Apologies to any other spinners reading this for all the obvious explanations, but I do have non-spinners who read my blog and they probably wouldn't have a clue what I was talking about otherwise!


So, this is what 83 cotton bolls look like once they're spun.  When I started, I thought I would need the best part of two bobbins for the amount of cotton I had, but obviously it's quite deceiving.

Although I've dabbled a bit with spinning cotton, this was my first full bobbin, ever.  I started off a bit shaky, trying to work out a system of drafting that worked for me.  Long draw is supposed to be the optimal method, and I did try that, but basically I'm not very good at it.  I think I need to practice with wool.  In the end I came up with a method that I found easiest - my forward hand was about 8 inches in front of the other hand which was basically allowing a little bit of twist to enter the cotton at a time.  I got on quite quickly after that.

Even though I've been spinning for more than 26 years, spinning cotton was like starting to learn all over again, and I'm sure I've still got a lot more to learn.  One big mistake I made was taking the single thread off the bobbin, making it into a centre-pull ball on my wool winder, and plying from the two ends.  Absolute nightmare!  I had various episodes of complex knots forming because of the amount of twist in the cotton.  The first of these was impossible to untangle and I ended up cutting it out!


The offending article - it looks quite professional like this doesn't it?  No sign of the horrors lurking within.  Eventually though it was all plied up and ready for scouring.  At this point I weighed it - 130g before scouring.


This was dunked in a pan of water with some washing-up liquid and boiled for a couple of hours.  Then I rinsed it and repeated the boiling.  There was surprisingly little came out into the water, maybe because it was home-grown, not treated or sprayed with anything, and hadn't gone through commercial processing which apparently adds quite a bit of dirt. No idea really, but the water turned slightly yellow and that was it.

The final bit of processing for this hank of cotton was dyeing it.  I have lots of woad growing in the garden this year, some of which I planted, and lots which have self-seeded.  For this dye batch I used some of the self-seeded plants.

300g of washed, chopped woad leaves ready for their journey into the blue :-


Boiling water was poured over the leaves and left to sit for an hour, after which the leaves are strained out.  Then comes the chemistry!  After re-heating to 50 deg. I sprinkled in washing soda until the colour of the water changed to a greeny-brown, then whisked for about five minutes until the resulting froth on top turned blue . . . and what a blue!


I then let this sit while the froth subsided, then re-heated to 50 deg and sprinkled Spectralite on top to remove oxygen from the solution.  This then turns a yellowy colour and after about 45 minutes is ready to go.


The cotton skein was then carefully lowered into the water (don't want to risk getting any air bubbles in there) and left to soak overnight.  This is not strictly necessary - I've had good blues develop from a 15-30 minute immersion - but by the time I got to this stage it was getting pretty late.

The next morning I (carefully again - this dye bath probably still has some colour so I didn't want to introduce air) removed the skein and hung it up in the fresh air for the blue to develop.


It comes out of the dye bath yellow, then turns green, then blue.  I did have to re-plunge this because I had light coloured marks where I'd tied the skein.  You can just see this on the top right.


Finally, the finished woad blue cotton.  From seed to skein :-


Quite a journey!